 University of Utah
Overview

Google Colaboratory, also known as Google Colab, is a cloud-based notebook environment from Google. It lets you write and run Python code in a web browser without installing Python, Visual Studio Code, or other local development tools.
This guide shows how to sign in with a Google account, open Google Colab, create a new notebook, run a simple Python program, add a text cell, run the notebook, and share it with others.
Requirements
- A web browser.
- An internet connection.
- A Google account.
- Basic ability to sign in to a website and create a new document.
Important Notes
- Google Colab runs in the cloud, so you need internet access.
- Your notebook interface may look different depending on browser, theme, and Google interface updates.
- If you share a notebook, review its contents first.
- For classroom work, use the notebook name and sharing settings required by your instructor.
Part 1: Getting Started with Google Colab
Follow these steps to open Google Colab for the first time.
Step 1.1: Open Google and sign in
- Go to the Google main page.
- Click the Sign In button.
- If you do not have a Google account, click Create account and follow the on-screen instructions.
- Sign in to your Google account.
Step 1.2: Open Google Colab
After signing in to Google, go to the Google Colab site.
If everything worked correctly, you should see either a welcome page or an empty Jupyter notebook page.
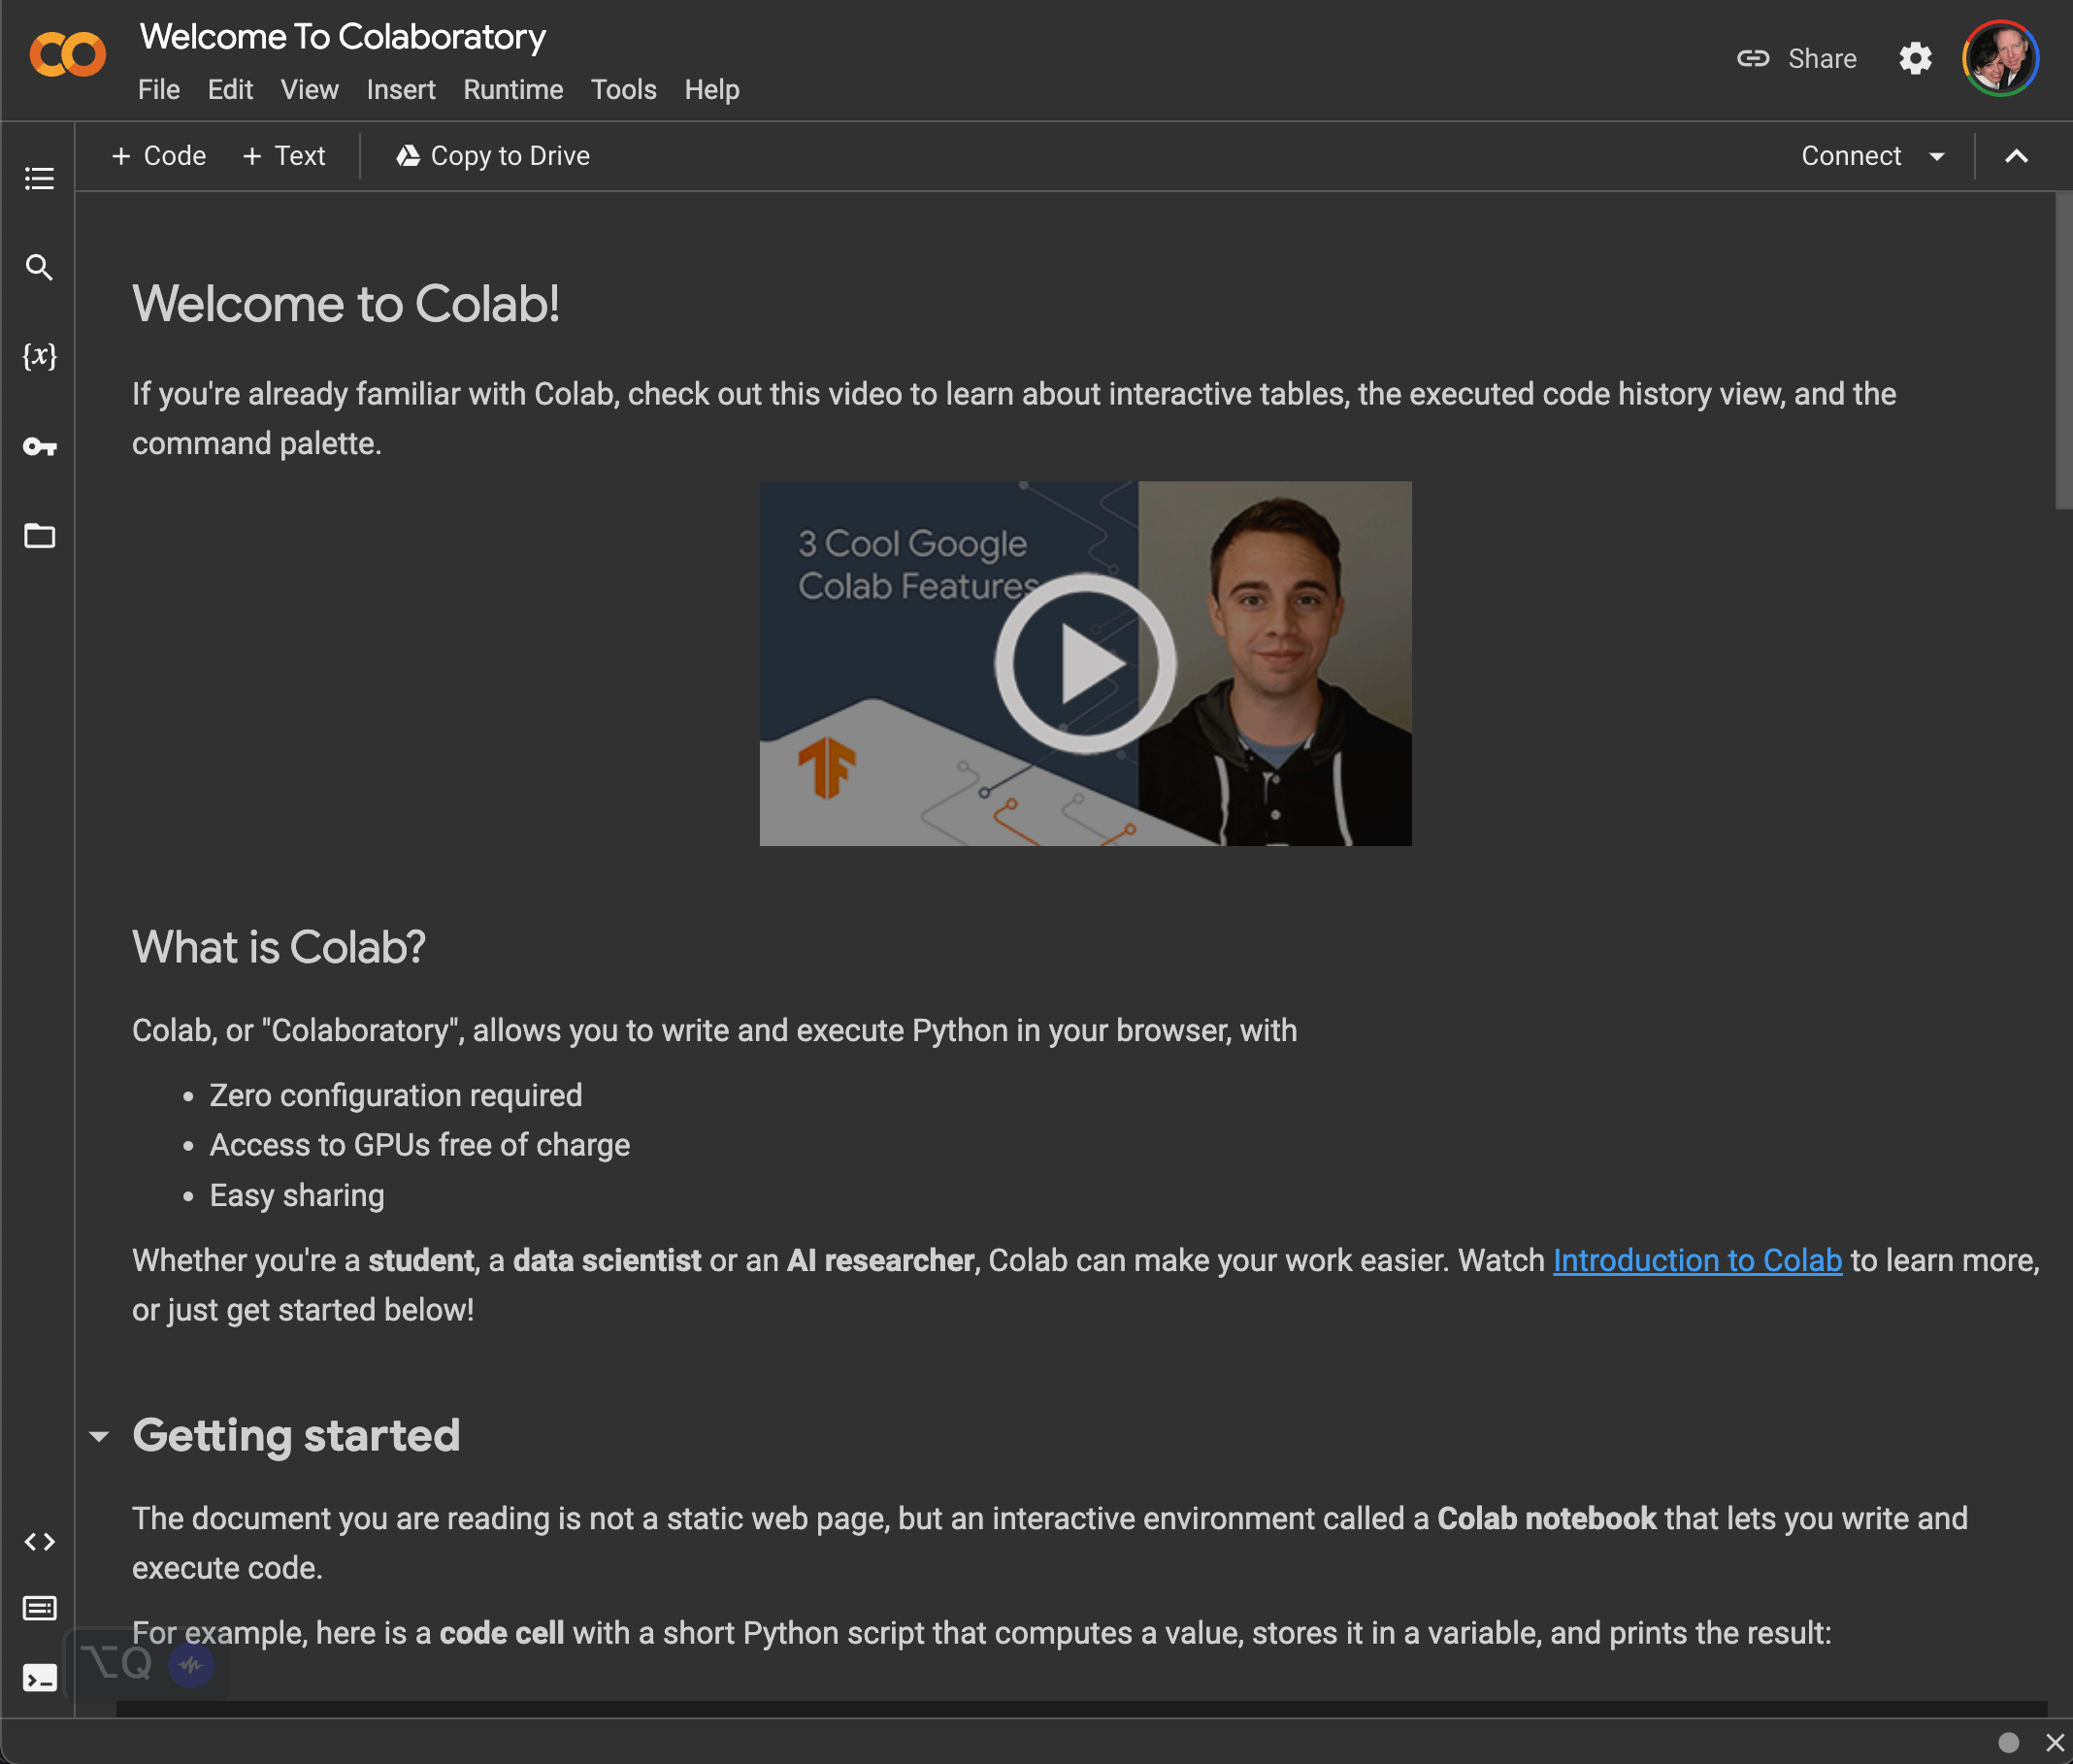
Your pages may look different. For example, the screenshots may show dark mode, while your browser may show a light background.
Part 2: Test Your Colab Setup
Follow these steps to create a simple notebook and confirm that your Google Colab setup works.
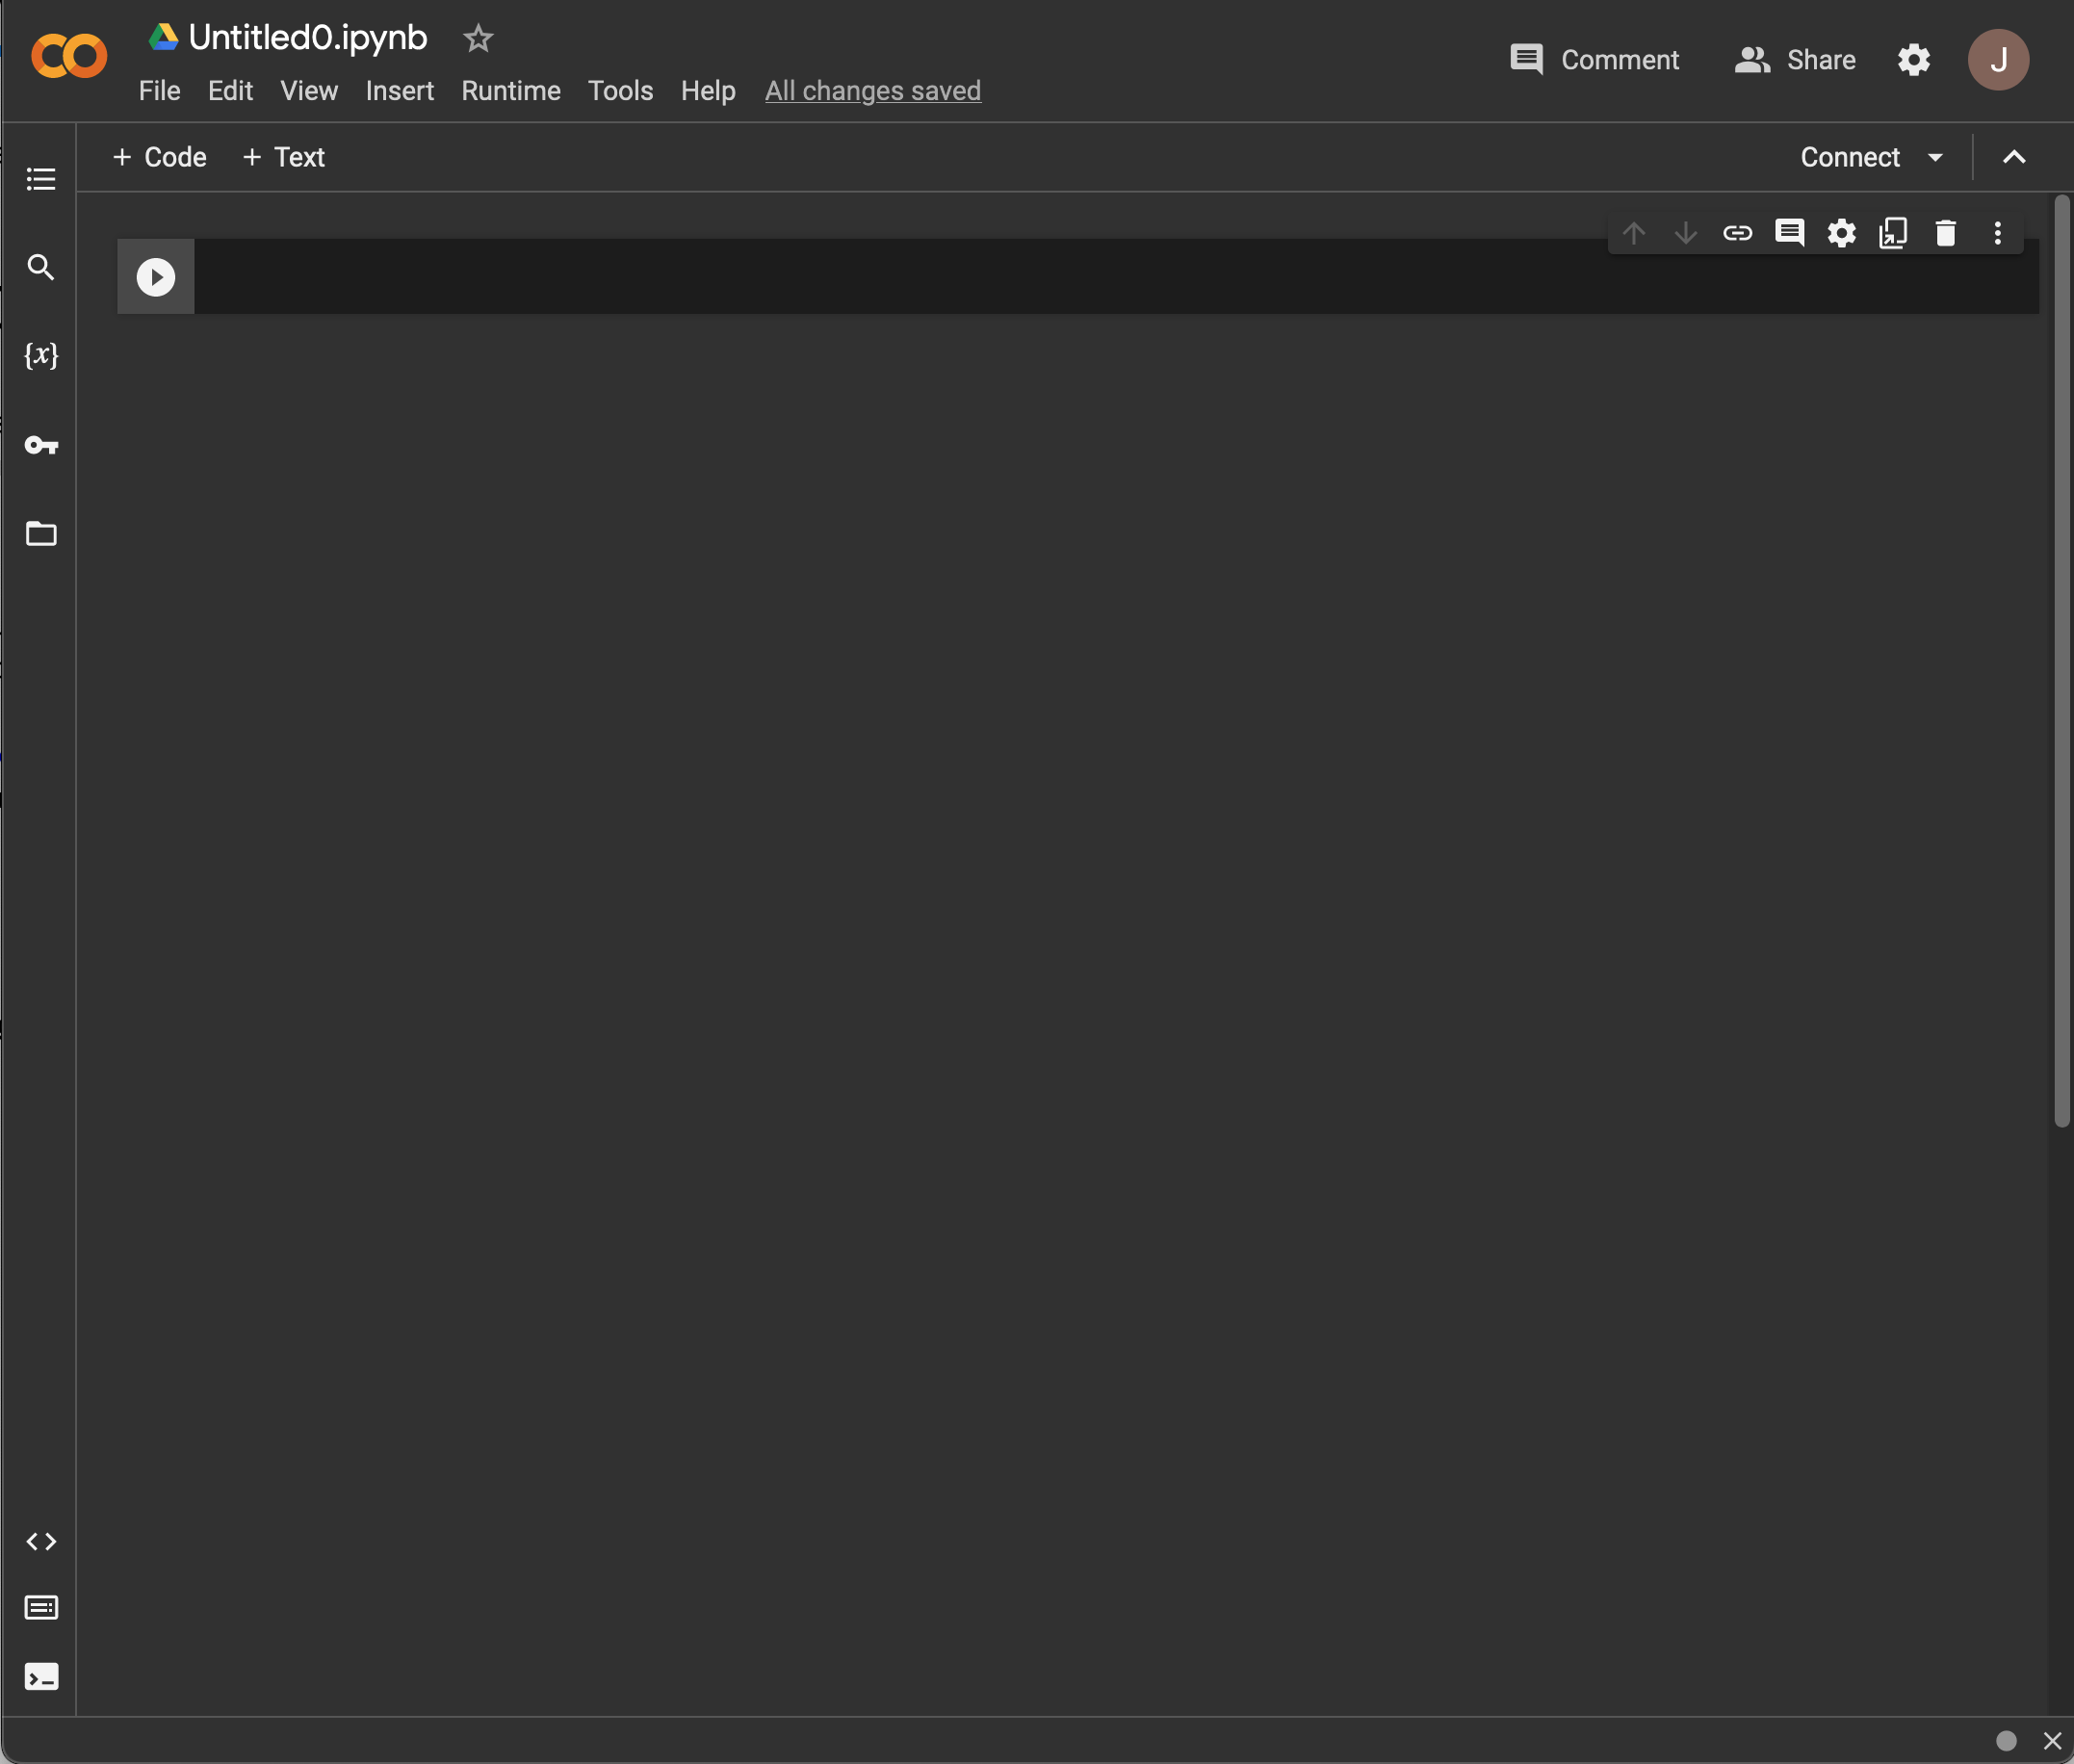
Step 2.1: Create a new notebook
- If you see the welcome page, click File, then New notebook.
- If an empty notebook is already open, continue to the next step.
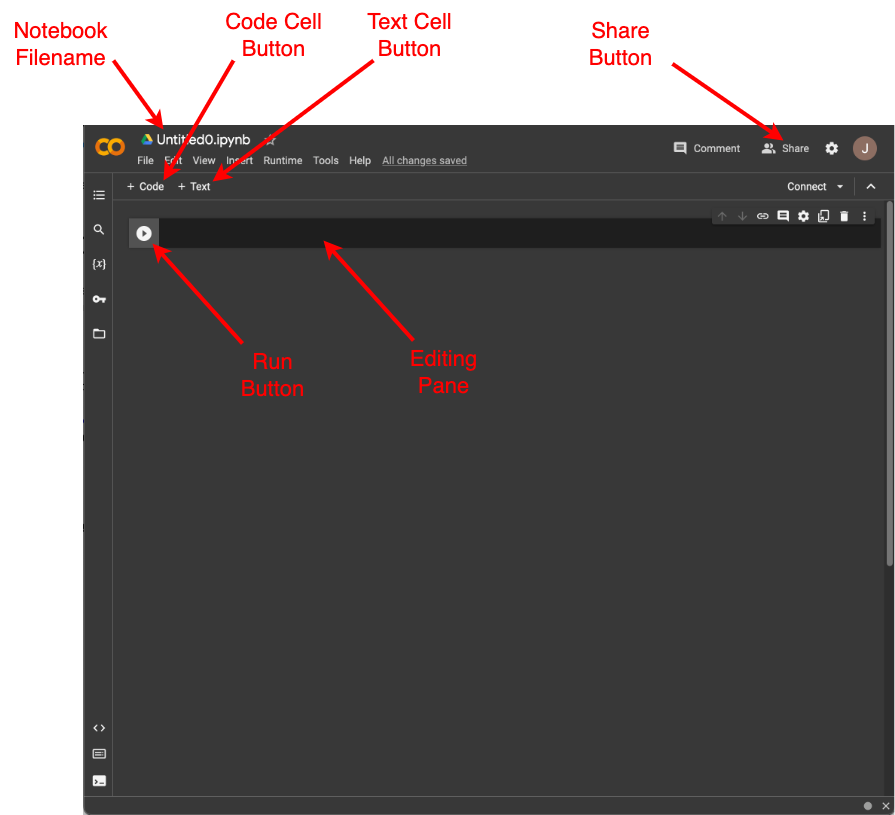
Step 2.2: Review the notebook interface
A Colab notebook is made of cells. Code cells run Python code. Text cells contain notes, headings, instructions, explanations, or other written content.
Step 2.3: Rename the notebook
Double-click the notebook filename, such as Untitled0, and change it to:
FirstNotebook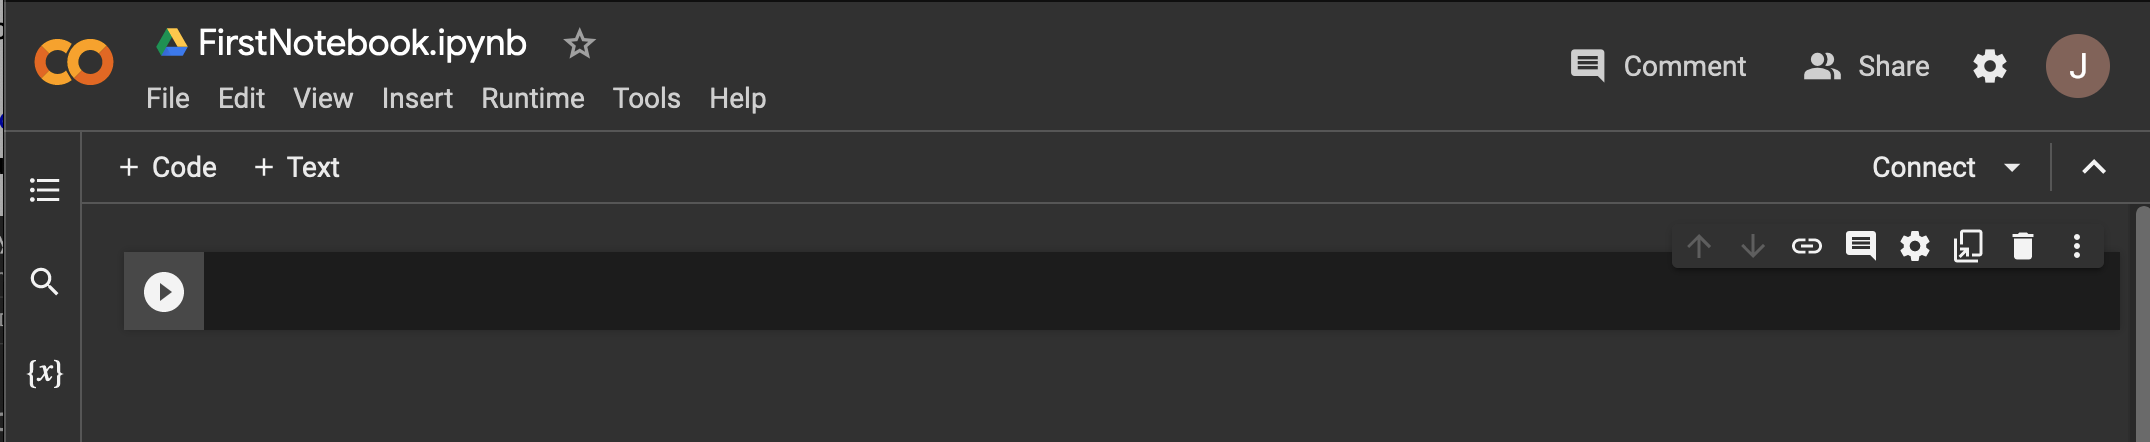
Step 2.4: Write and run a Python print statement
In the editing pane, type the following Python code. You may replace the name with your own.
print("Hello, my name is John.")Then click the Run button.
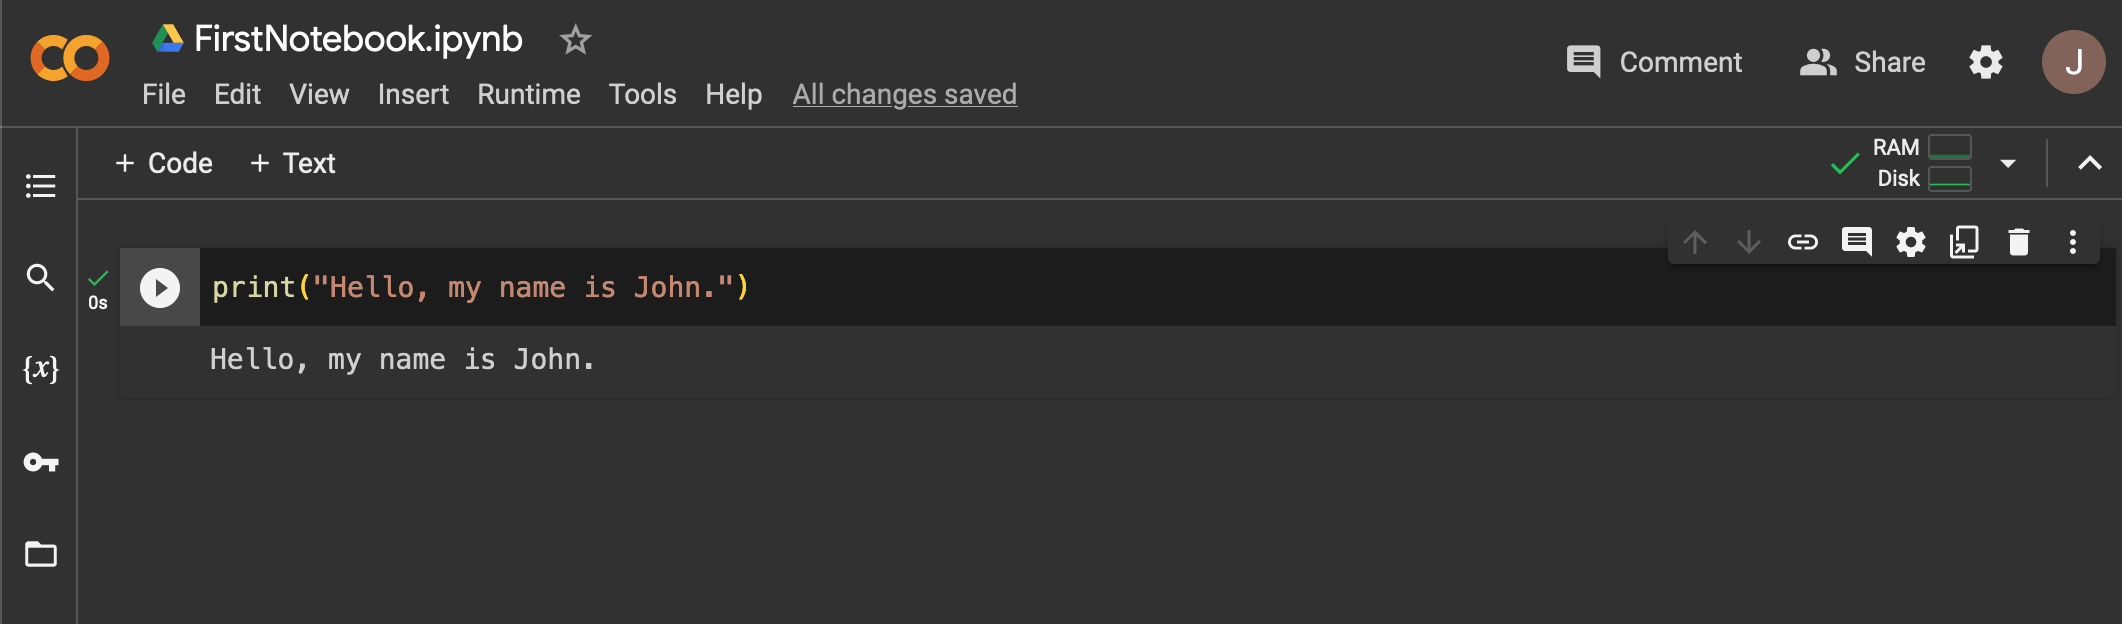
The code tells Python to print the sentence inside the quotation marks. When you click the Run button, the output appears below the code cell.
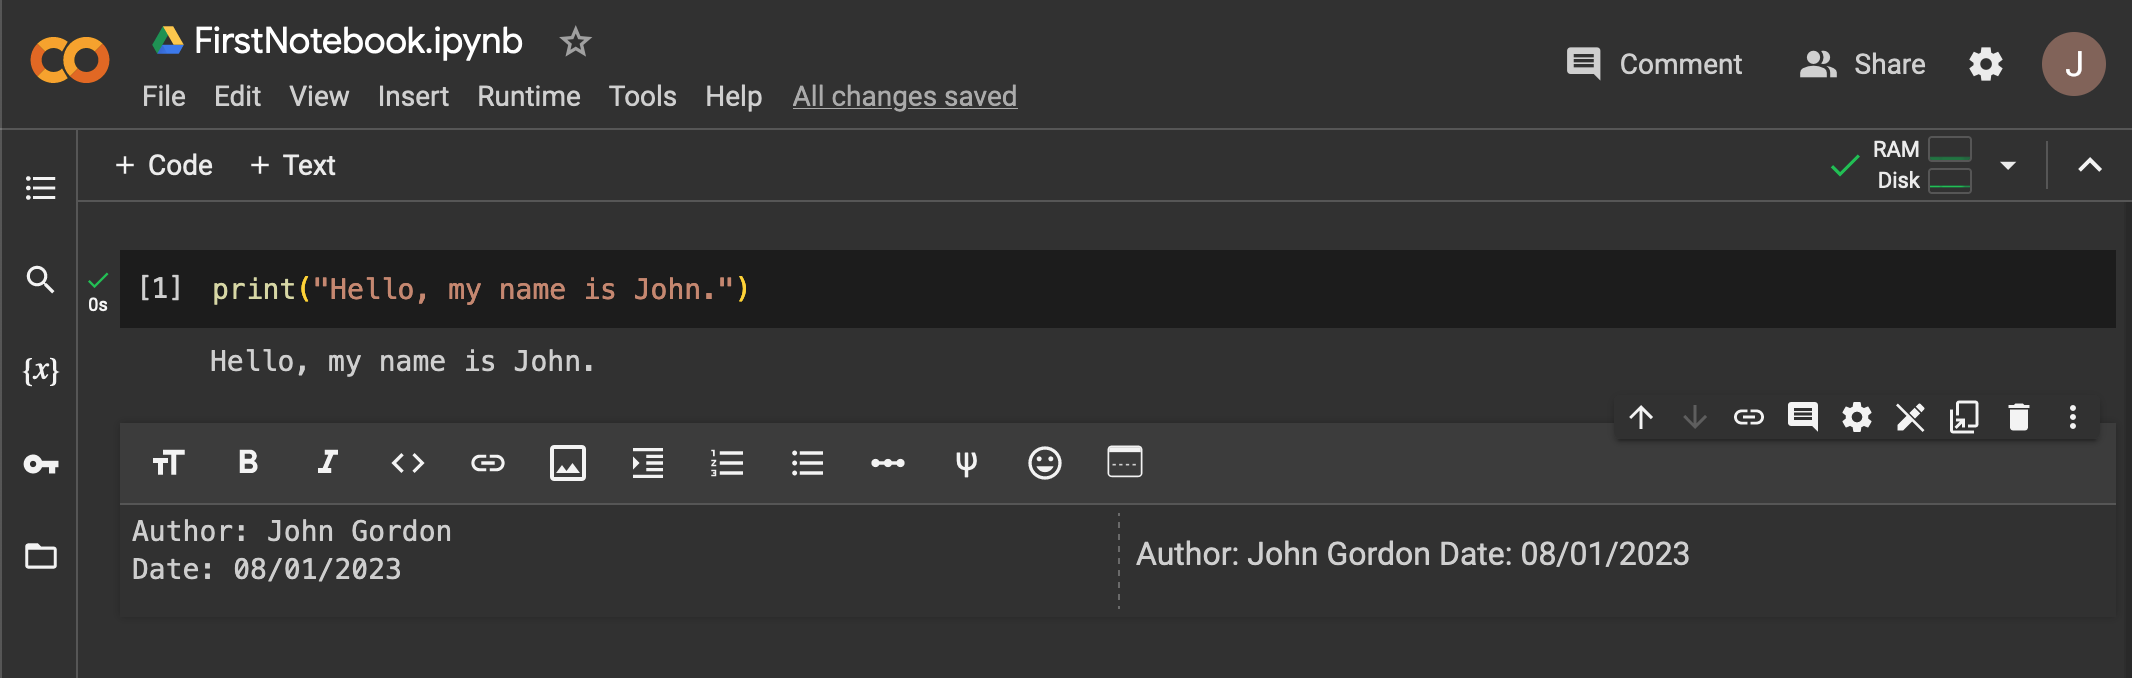
Step 2.5: Add a text cell
Click the Text cell button. A new text cell should appear below the existing code cell.

In the text cell, type Author: followed by your name and Date: followed by the date you created the notebook.
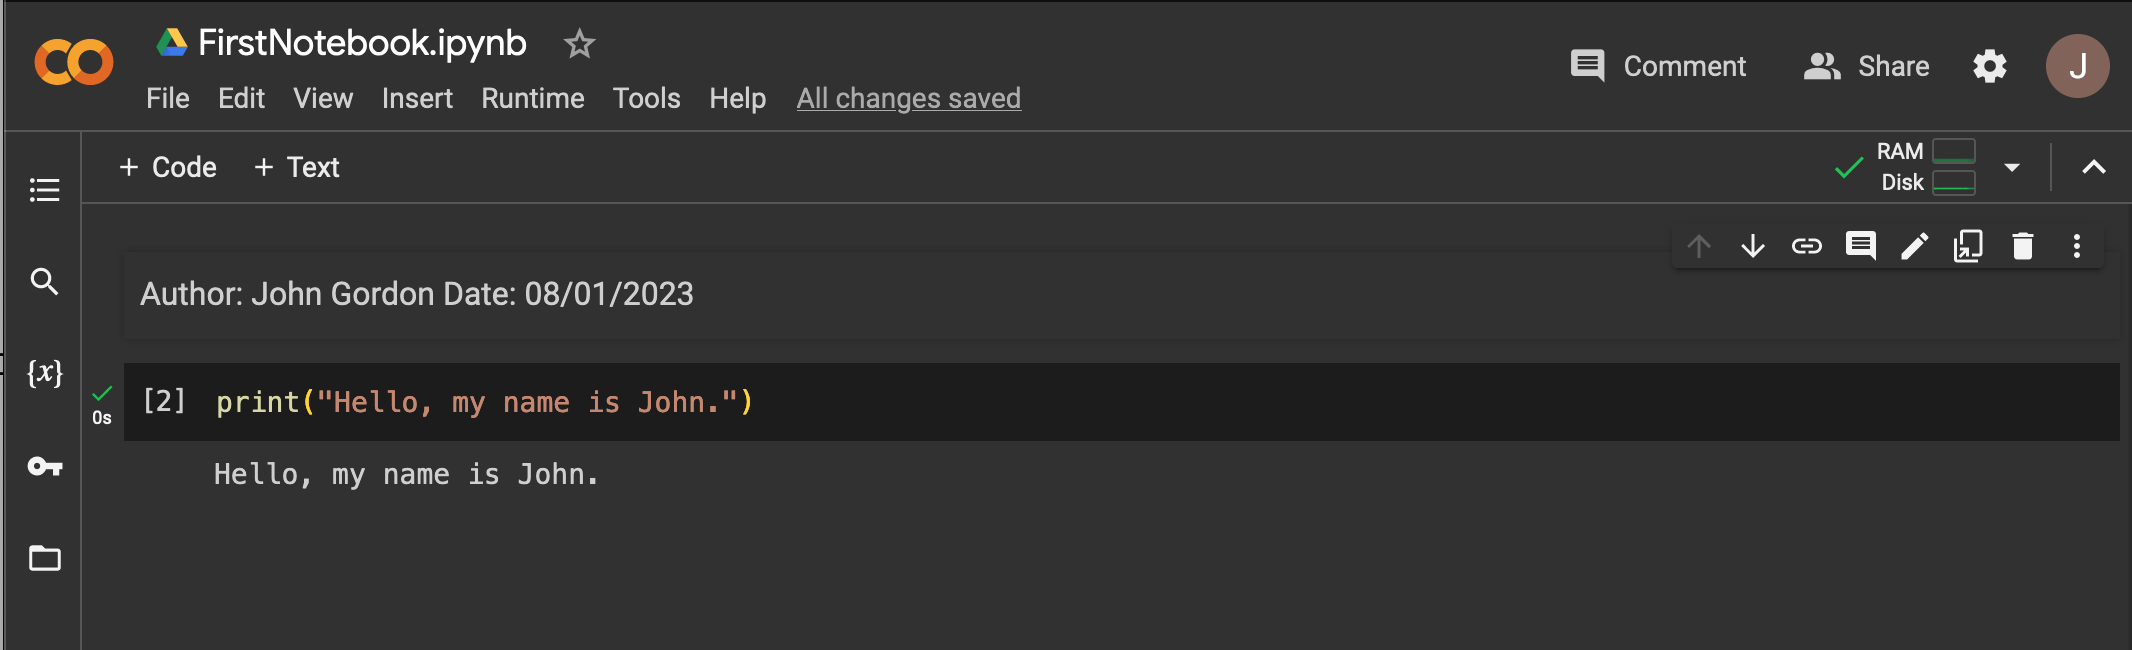
Step 2.6: Move the text cell above the code cell
Click the up arrow on the right side of the text cell.
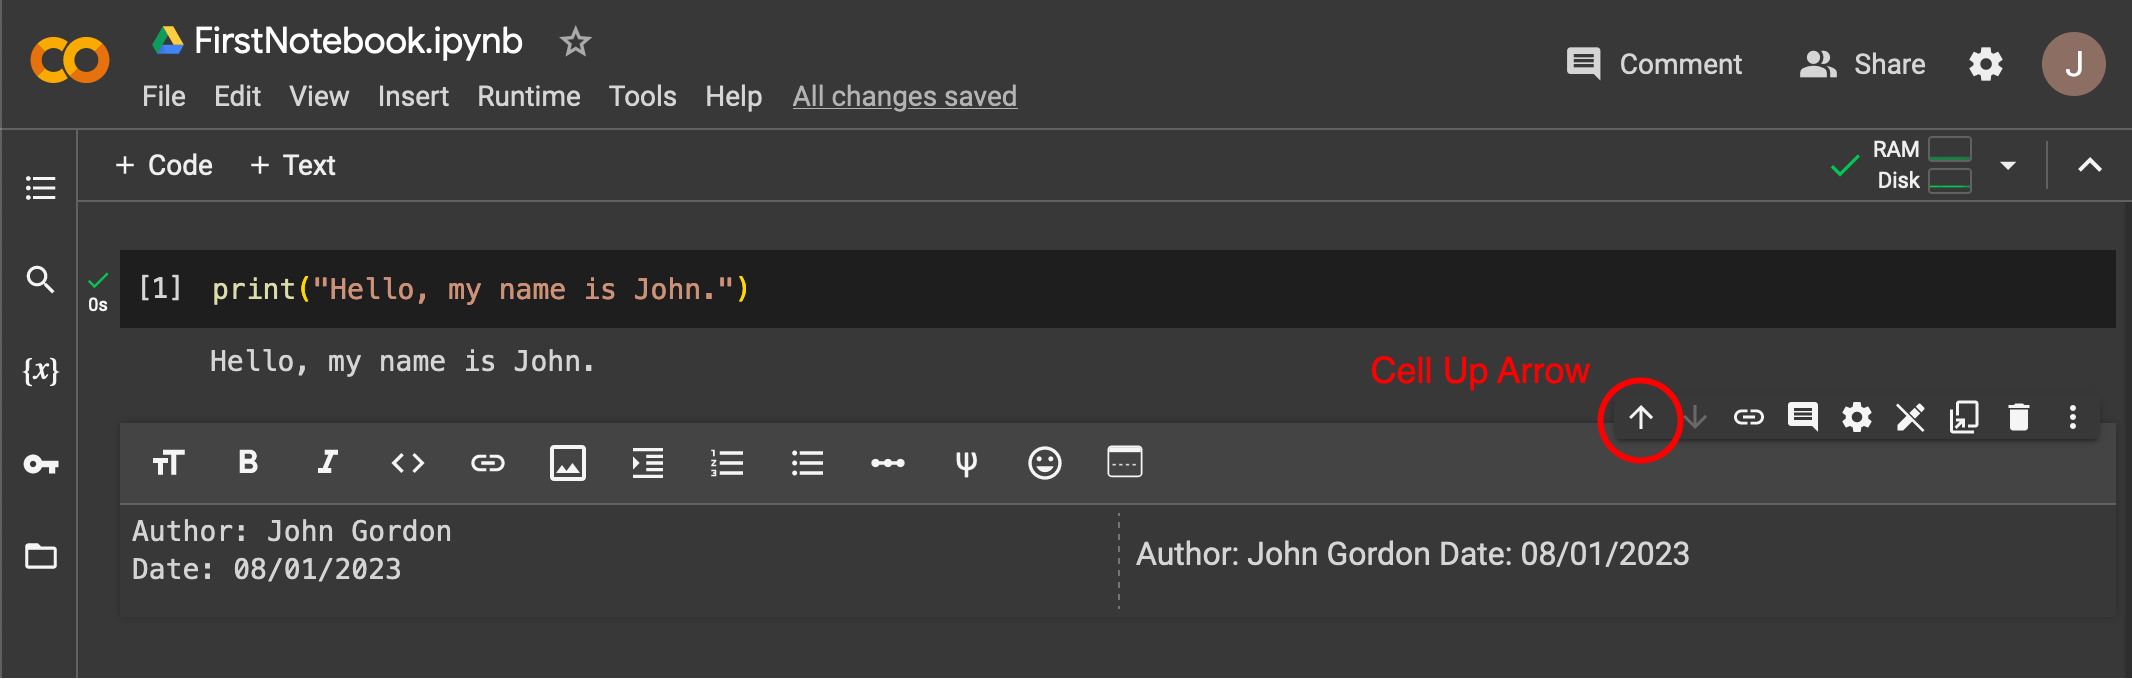
The text cell moves above the code cell.

Step 2.7: Run the whole notebook
Click the Runtime menu and choose Run all. This confirms that the notebook runs correctly from top to bottom.
Step 2.8: Share the notebook
Use the Share button to share your notebook with others. This works like sharing other Google documents. You can share with specific people by email address or create a shareable link.
- Google Colab lets you run Python code in a browser.
- A notebook can contain both code cells and text cells.
- Use Runtime > Run all to test the notebook from top to bottom.
- Use the Share button carefully and review the notebook before sharing it.